
This is a mini project to make your own bead & wire Christmas decorations. We’ve taught it over the years to craft groups and Make & Take sessions here at the shop. I surprised myself when I realised I’d not yet shared it as a project for you all too!
These decorations are great fun to make, they can be as simple or as complex as you like. You can also make them in any shape or colour you fancy too.
Materials you’ll need
Thick wire approximately 1mm – 1.5mm is ideal.
Fine wire 0.4mm is perfect for this, but you could also use 0.3mm.
A selection of beads. How many you need will depends on the size and style of your decorations. Bead mixes or seed bead mixes are great for this project.
Tools needed
Wire cutters
Chain nose pliers
Round Nose pliers
Making the decoration
I have also recorded a video showing the whole process which you can find below the instructions.
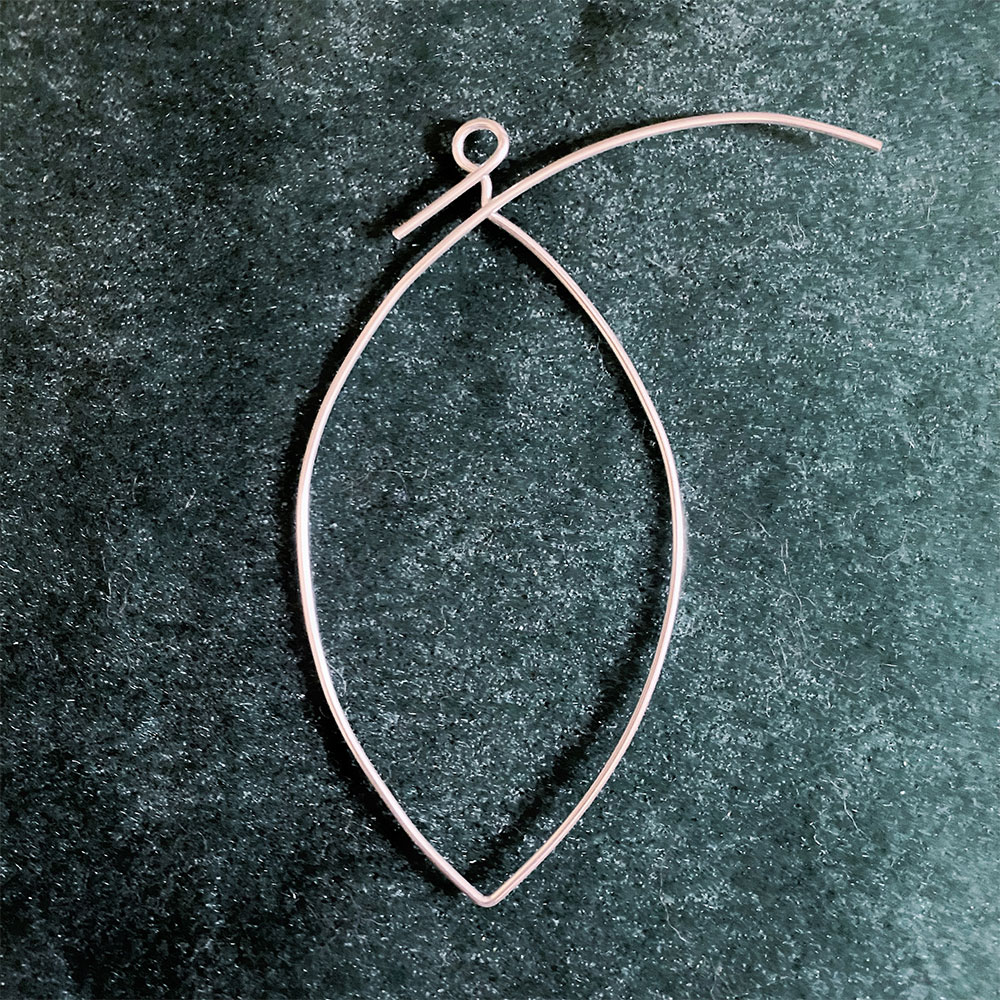
Getting started; the first part of this mini project is making your frame. You can sketch a shape on paper first to help, particularly if you’re making a star or more complex shape. If this is your first one, I’d stick to a simple design.
Top tip: Don’t make your frames too big as they can lose their shape. No bigger than 8cm to start with is ideal.
Here I’ve chosen a simple drop shape. The curve of the wire really helps with this design too. Once you’ve formed the basic shape you need to secure the ends of the wire. I made a simple loop in one end (big enough to thread ribbon through later). Then used the other end of the wire to wrap below the loop to hold everything in place.

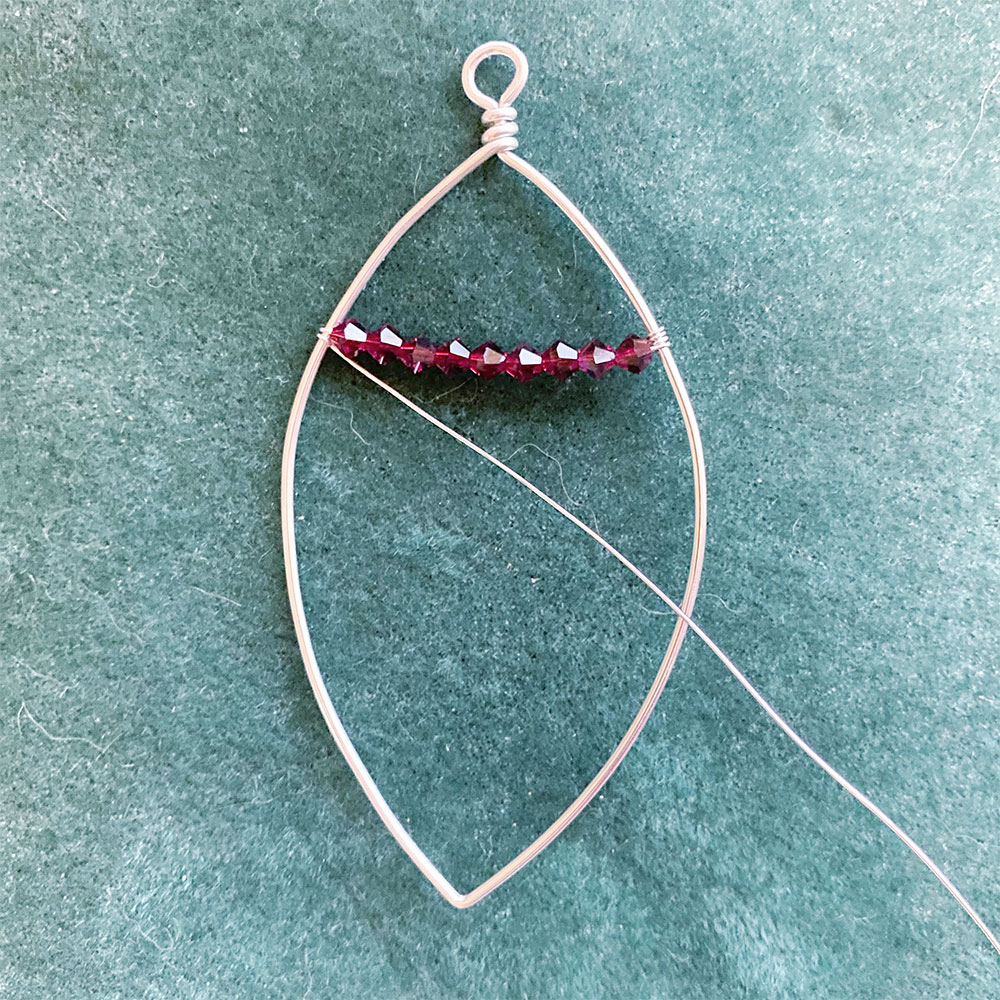
The next stage is decorating the shape. Here I’m using the 0.4mm finer wire and I have chosen to use one of our Preciosa Crystal Bicone mixes, in Christmas shades (they save you a lot of time gathering beads together). Cut a manageable length of wire (approx. 50cm) and secure the wire to the frame by wrapping the end tightly around the point you want to start from. Trim off the excess tail of wire, and use the chain nose pliers to squeeze the wrapped wire against the frame to hold it in place. Thread beads on to your wire, until you have enough to reach across your frame, then wrap the wire twice around the frame to hold it in place.
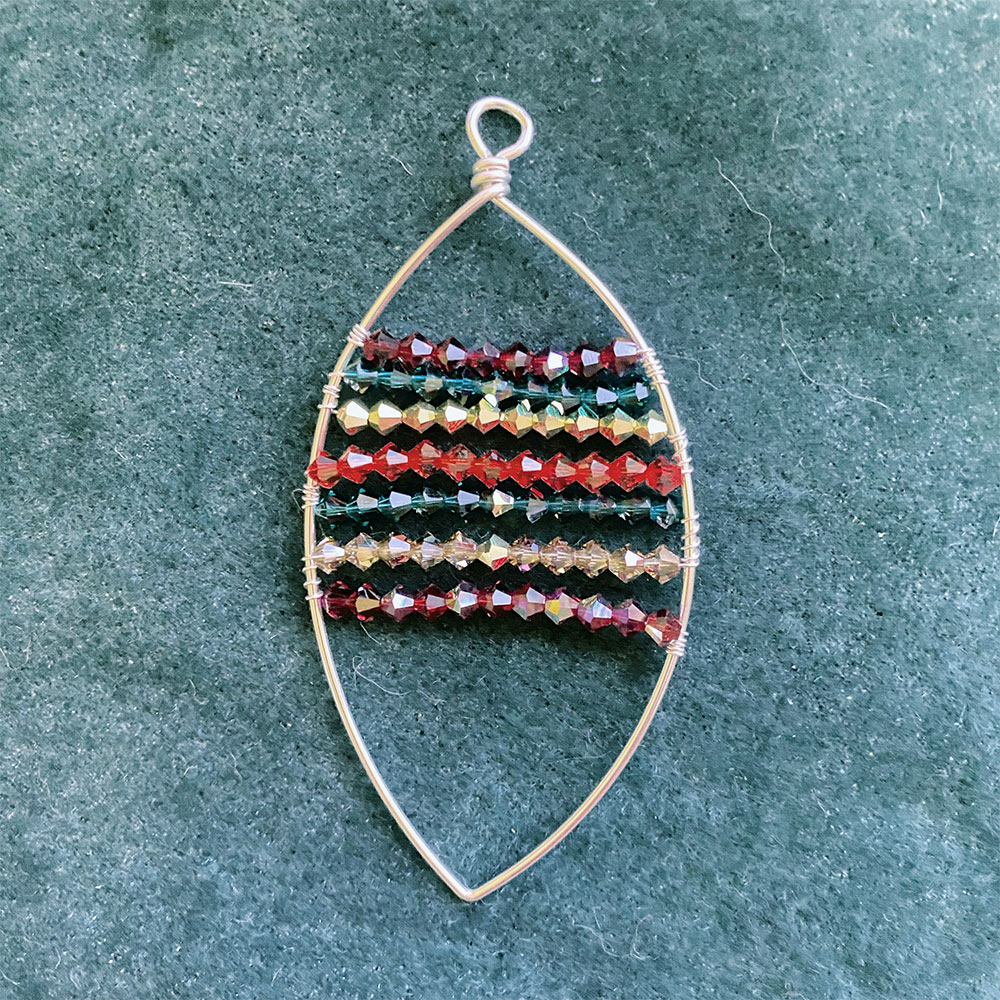
Keep repeating this until you have all the beads you want attached. To finish secure the end of your wire by wrapping around the frame several times and squeezing in place again with the chain nose pliers. If you run out of wire, cut a new piece and attach it in the same way and continue with your design.
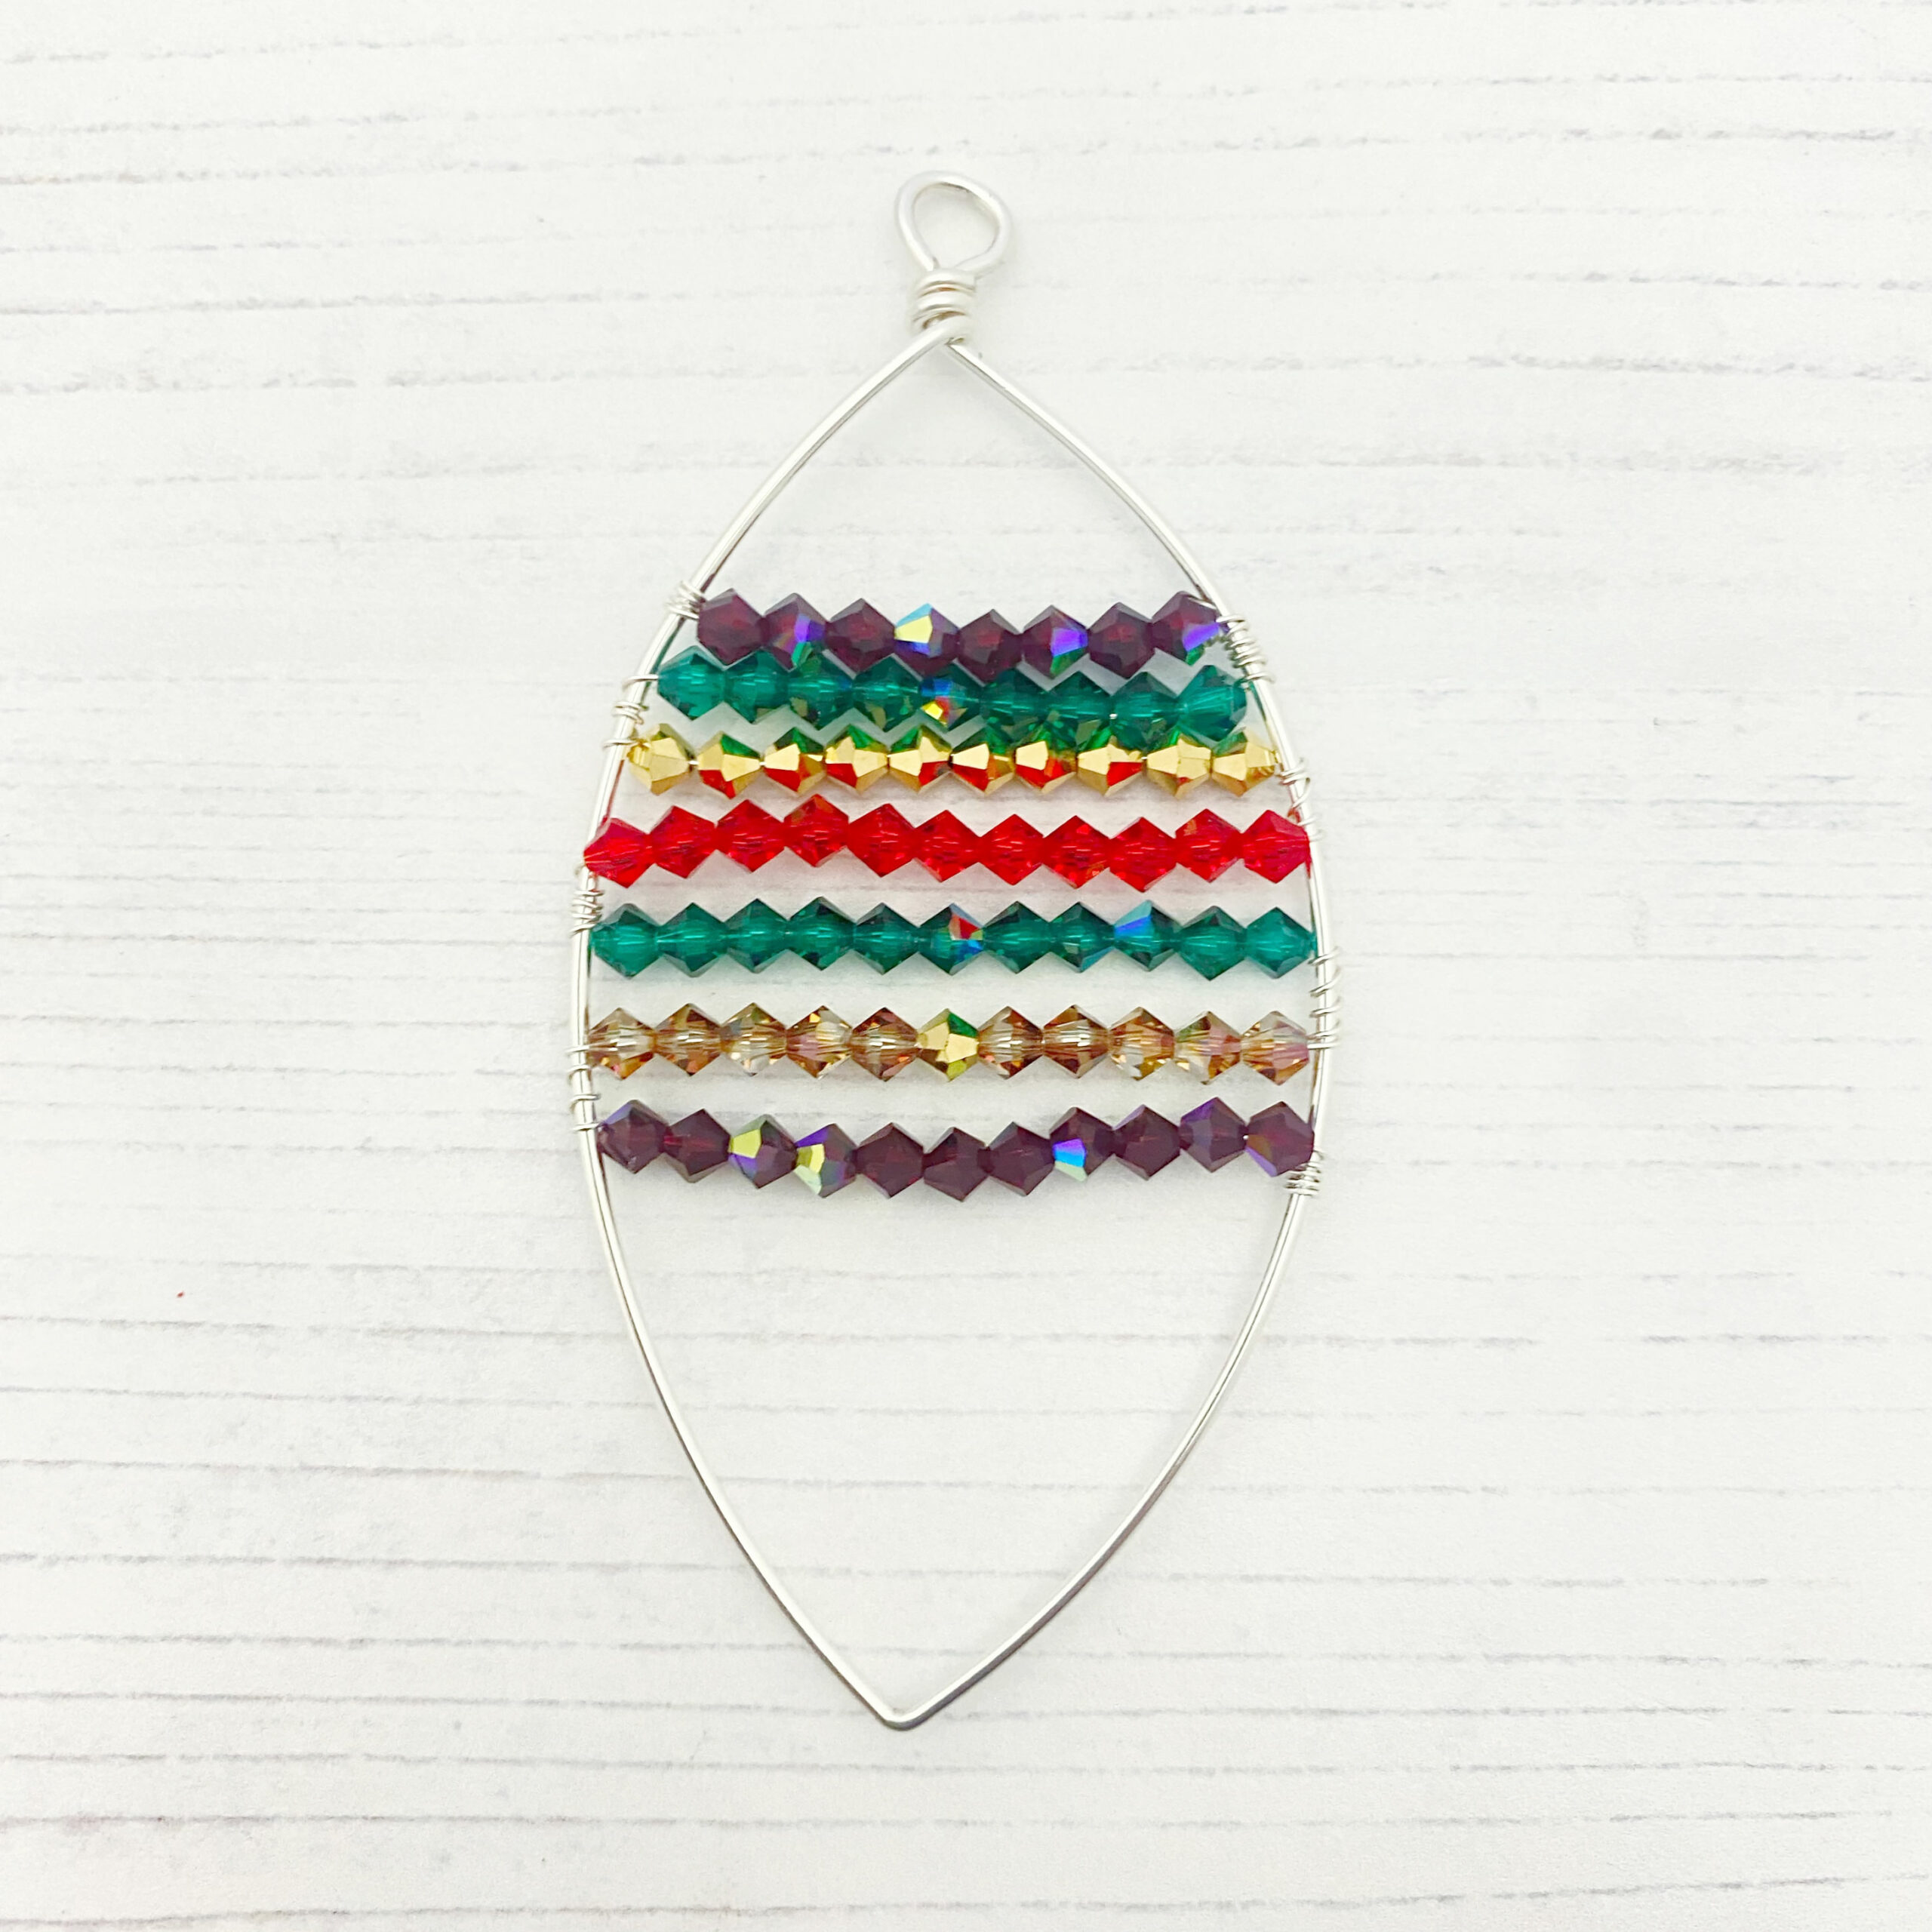
We hope you’ve enjoyed creating your simple wirework Christmas decorations. You can start experimenting with different styles and designs. The size of bead you use will also give you very different effects too.

Here are a few ideas for you. These decorations also make great gifts or fun ways to enhance your gift wrapping.
You can watch the full video of making this decoration here:
For more free projects and inspiration you can head to our YouTube channel or why not check our our free project page.