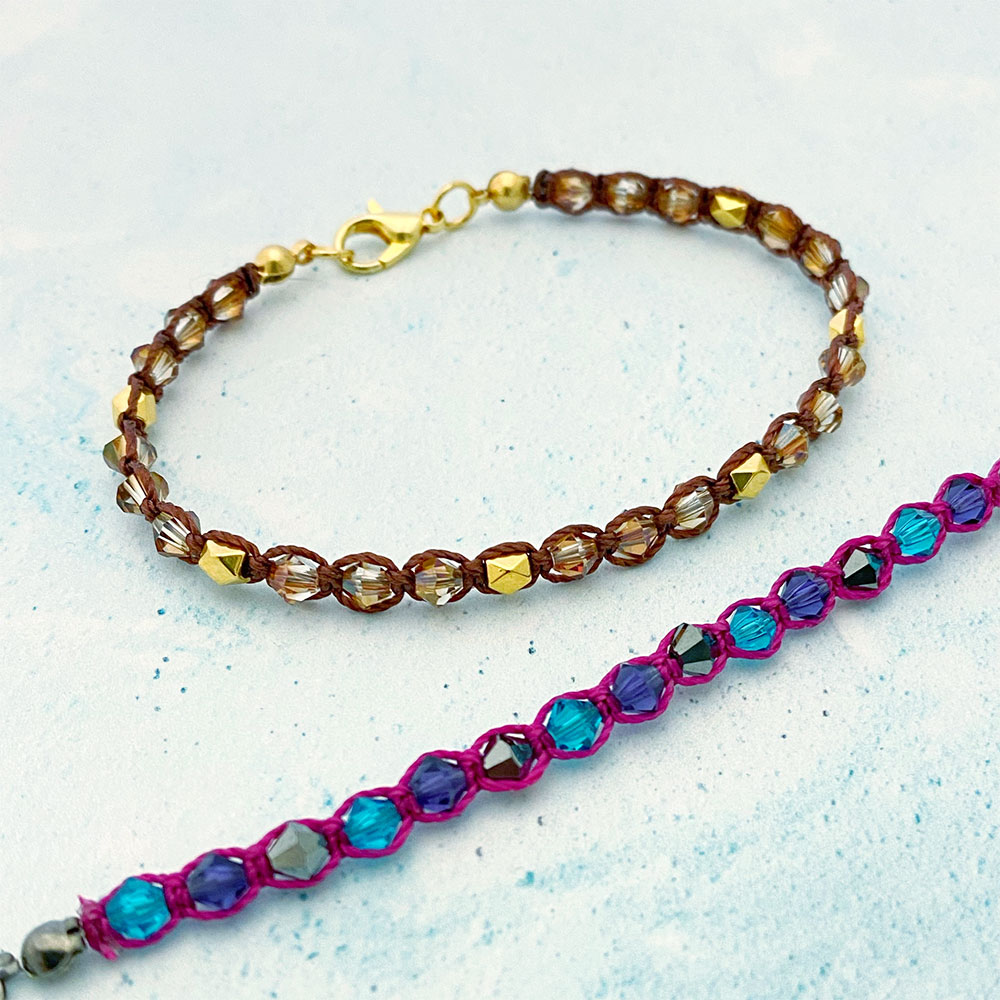
This bracelet is an elegant grownup version of a classic friendship bracelet combining simple stringing techniques with a basic macrame knots to create a hybrid design.
This design will works well with lots of different beads. I’m working with S-Lon cord, so I didn’t want beads larger than 4mm, other wise the cord would get over shadowed by the beads. This also gave me a great opportunity to use the new Crystal Venus 4mm Preciosa Bicone beads. I used them with gold plated polygon spacer beads.
Materials
The joy of creating your own jewellery means you can tailor it to the colours you love or custom make them for friends. Here are my 2 examples.
The Golden bracelet materials (finished length 17cm)
Brown S-Lon cord (approximately 1m)
4mm Preciosa bicone beads in Crystal Venus (21 used)
Polygon spacer gold plated (6 used)
Approximately 20cm flexible beading wire (1 used 19 strand bright as I had a short piece left from a previous project 7 strand would also work)
A pair of necklace ends gold plated
2 gold plated crimp beads
2 x 5mm jump rings gold plated
A medium trigger clasp gold plated (you can use your perfect clasp)
The Vibrant Pink bracelet (finished length 17cm)
Magenta S-Lon cord (approximately 1m)
4mm Preciosa bicone beads in Deep Tanzanite (9 used)
4mm Preciosa bicone beads in Blue Zircon (9 used)
4mm Preciosa bicone beads in Jet Haematite (8 used)
Approximately 20cm flexible beading wire (1 used 19 strand bright as I had a short piece left from a previous project 7 strand would also work)
A pair of necklace ends black plated
2 black plated crimp beads
2 x 5mm jump rings black plated
A medium trigger clasp black plated (you can use your perfect clasp)
Tools
You will need Chain Nose pliers and sharp scissors.
You will also need Hypo Cement glue to secure the ends of the thread.
You’ll find a Macrame board useful (but not essential).
Making the Bracelet
At the very end of your wire thread on a necklace end (through the back) followed by a crimp bead. Securely squash the crimp at the end of the wire. Close the necklace over the top of the crimp. We have a video that shows this (and adding your clasp) in more detail here;
I used a macrame board and a pin to help hold everything in place. If you do not have one you can tape your work down to your working surface (being careful not to damage the surface).
Thread your beads into the wire in the order that you like. Trap the end of your wire in the macrame board. Or use a bead stopper to stop your beads from sliding off the wire.
Next tie the centre of your S-Lon cord to the wire, just after the necklace end and before your first bead, using a simple over hand knot.

Next tie a Square knot. The image below shows a square knot, if you already know how to make a square knot, go head and tie one pulling your cord firmly.
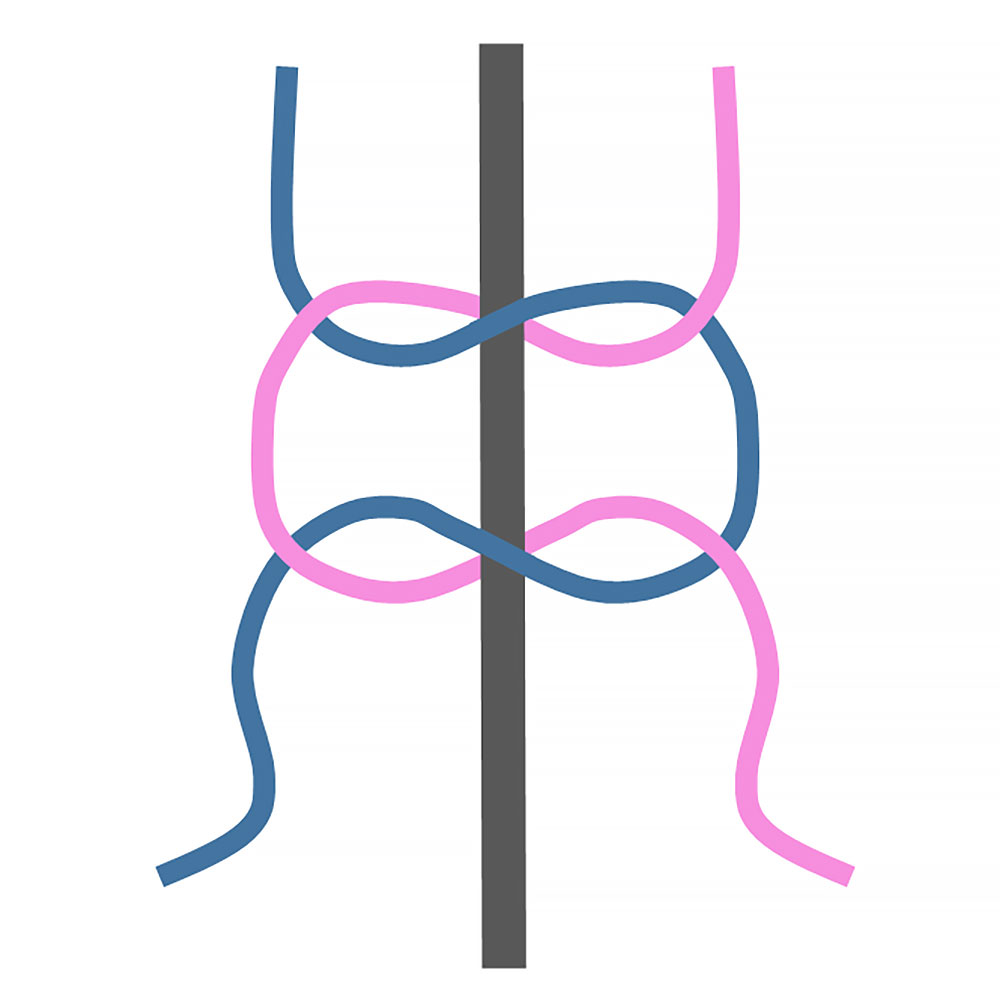
If you haven’t tied one before we have a useful video about Macrame knots that show this knot;
Next slide your first bead up to your square knot. Then tie another square knot after the bead. Repeat this until you have secured all your beads in place. Measure your bracelet around your wrist. You’ll want the two end to be about 1cm apart (to allow for the clasp) for a comfortable fit.
Using the Hypo cement apply a small amount of glue to both ends of the thread where they are exiting out of the knot. Once the glue is dry cut off the excess thread.
TOP tip. Be patient when waiting for the glue to dry before snipping off the excess thread. I trimmed the ends too soon and my last knot came undone. I had to remove the last bead and glue the next knot to save it. If you’re worried about the knot not holding after trimming off the ends add a tiny bit more glue to side of the knot.
Now slide the necklace end on to the wire followed by the crimp bead. Use the chain nose pliers to slide the crimp bead into position. Squash it firmly to ensure it has gripped the wire. Cut off the excess wire and close the necklace end. Close the hooks (to form loops) on each necklace end. Then use the chain nose pliers to twist open the jump ring. Use it to attach a clasp on one side of the bracelet and add a jump ring to the other. If you need help with the part, this is also shown in the first video above.
Now your bracelet is complete. We hope you enjoyed making it.