This Loopy Earrings Project uses a basic brick stitch foundation row around a closed link, followed by loops of beads which give the project it’s name. The design is easy to adapt to make long, short, simple or full. You can also attach your preferred ear wire to them. Perfect for refreshing your wardrobe, making gifts and stash busting.

Materials Used
Beads – I’ve used all size 11 seed beads in these examples. If you change the size of bead you may have to play around with the amounts of beads you use too. Larger beads won’t work well for the loops as they won’t have enough drape.
Links – I’ve used a variety of our quick links and connector links for these examples. You can see our full range here. I have also listed the individual items used below the images of the earrings at the bottom of the page.
Thread – a soft beading thread is needed for this, to get a nice drape, so SoNo, Miyuki thread and Nymo is ideal. Avoid stiffer threads like wildfire, Supplemax and Fireline as this will cause the loops to stick out as awkward angles. I used a size 12 beading needle (you could also use a size 10).
Findings – for this you can us your preferred style of ear wire, I’ve used a range of different one for the earring examples.
Getting started – brick stitch foundation row
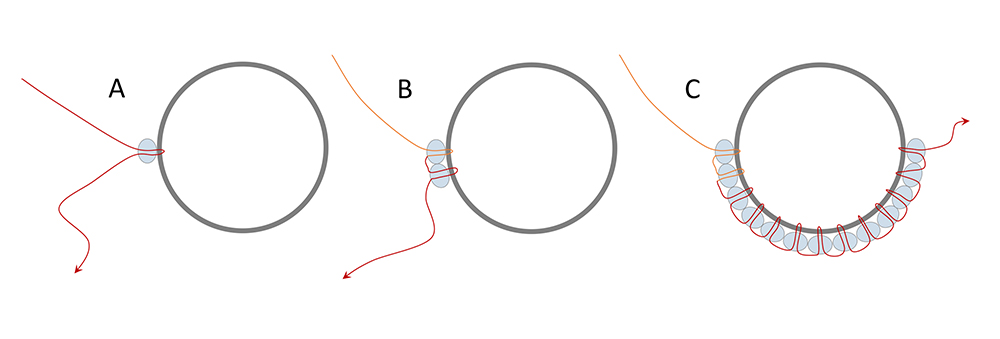
Cut a long length of beading thread approx. 80cm – 1m. Thread your needle. Pick up 1 size 11 seed bead and slide it along the thread ensuring it doesn’t drop off the end. Thread under the link of your choice and back though the seed bead, so the bead hole is sat against the edge of the link (A). Pick up another bead and take the thread under the link again and back though the second seed bead. This one should also be sat flat against the link, next to the first bead (B). Repeat this until you have added 13 seed beads (C).
Starting the loops
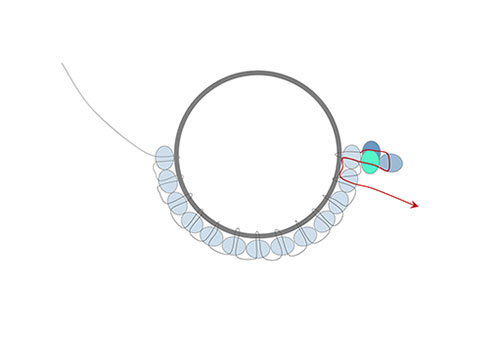
For this pair I created a subtle gradient into the centre. To do this I started with a loop of 3 beads; pick up 3 bead and thread back though the same seed bead, toward the link, go through the next bead in the foundation row, away from the link (you do not need to go through the link here). Now pick up 5 beads and go back through the foundation seed bead and through the next bead.
Continue adding loops of beads, adding 2 more bead to each loop; 7, 9, 11, 13 and 15. The loop with 15 bead will have been added to the central bead, then work backwards adding loops of 13, 11, 9, 7, 5 and 3. After adding the final loop of 3 bead and going back though the foundation bead, go under the loop and back through the first bead again. Tie the two end of thread together to secure both ends. Weave each end though a couple of beads and cut off the excess thread.

Loop Earrings variations


I started off by making myself the Zebra earrings – to try out the an idea. Wanting a maximum effect with seed beads, but a relatively quick make. I was pleased it worked.
Zebra Earrings:
Created with Opaque Black and White size 11 seed beads with a turquoise colour I picked out of the Miyuki Size 11 Tuti Fruti mix. I attached them to 20mm silver plated links and used my favourite earring component – the nice and secure lever back ear wires. Here started with 15 beads in my brick stitch foundation row. I then added another turquoise bead at the first and last bead in my loop and alternated back and white beads in between. Again I made graduated loops, adding an extra 4 beads each time, the the centre then mirrored the first half.
Peacock Earrings:
These used the Miyuki Size 11 Peacock seed bead mix and 16mm twisted ring. Hung from simple and elegant fishhooks. I picked out the same colour of bead just for the foundation row and then picked up the beads at random (this pair is detailed in the instructions above).
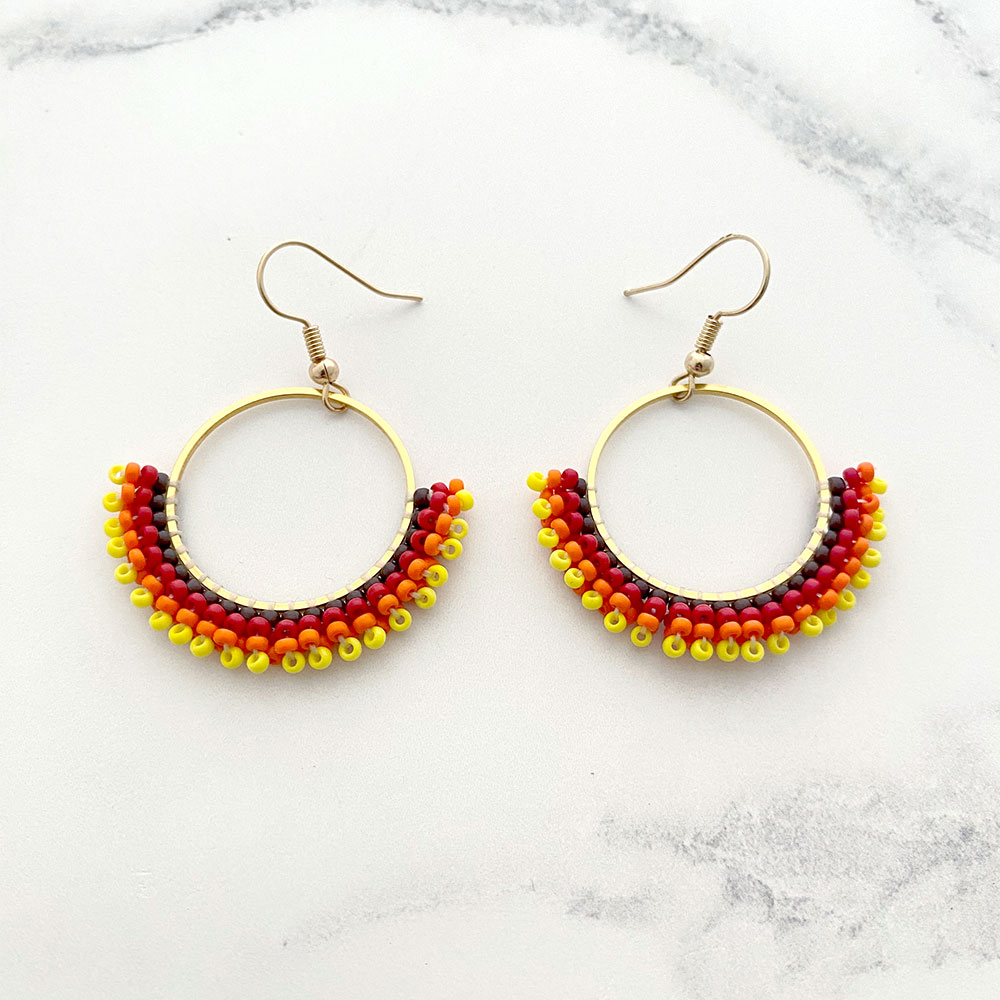
Fiery Earrings:
These were created using Opaque Brown, Red, orange and yellow seed beads. 25mm gold plated quick links, with fishhooks. The foundation row had 21 beads, then each loop was made up of the same 5 beads, 1 red, 1 orange, 1 yellow, 1 orange and another red seed bead. This created quite a different effect and really made the colour gradient stand out.
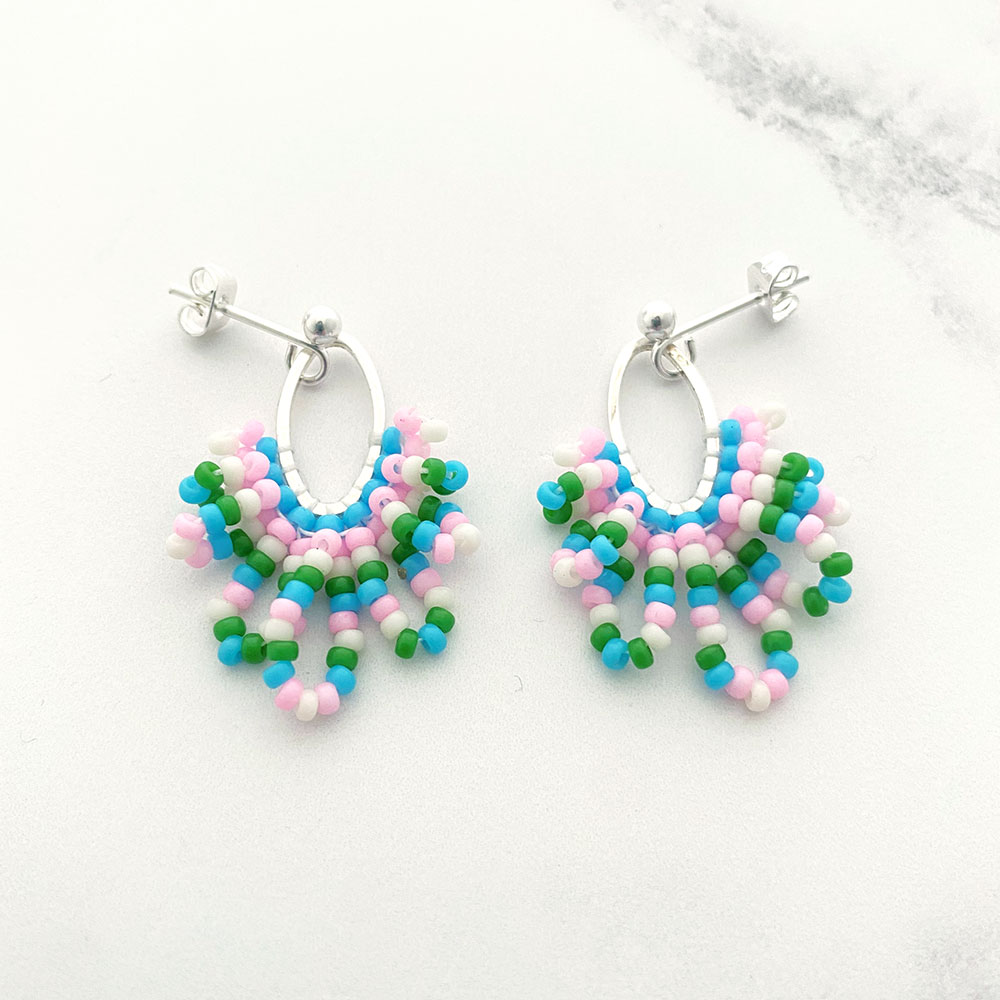
Spring Earrings:
These were created by picking beads out of the Miyuki Size 11 Tuti Fruti seed bead mix again (it really is a versatile mix). The link for these were the small oval quick link, with loop studs attached. These were a stripey repeating design with a 4 bead increases. A top tip here, would be to plan out the beads on a bead may first to ensure you have your pattern as you want it before starting.
We hope you’ve enjoyed your Loop Earrings Project. How will you customise your earrings? Or maybe you’ll create one as a pendant.
Remember to share your creations with us on social media. #TheBeadShopNottingham
If you want to learn more about Brick Stitch we have another great free project here. As well as a handing video on our YouTube channel which you can view here.
Happy Beading!